Build an AI Virtual Painter: Step-by-Step Python Tutorial | AI Valley Panchkula
Welcome to another exciting, hands-on tutorial from AI Valley! At our cutting-edge tech lab in Panchkula, students build incredible real-world projects like this every single week. Whether you are a curious beginner, a seasoned hobbyist, or a parent looking for the best coding classes for kids in Panchkula, this comprehensive guide will introduce you to the fascinating world of Computer Vision and Artificial Intelligence.
Today, we are going to build an AI Virtual Painter—a Python program that lets you draw on your computer screen simply by waving your hand in the air!
🎯 What You Will Build
By the end of this tutorial, you will have built a fully functional Virtual Canvas. Your computer's webcam will track your hand movements using state-of-the-art Artificial Intelligence. When you hold up one finger, you will draw on the screen. When you hold up two fingers, you will enter "Selection Mode" to choose different colors or an eraser. This magical, touch-free Augmented Reality (AR) interface is exactly the kind of interactive application our students build to master Python and machine learning.
📋 Prerequisites & Materials
To build this project, you do not need any complex hardware—just your computer and a standard webcam! If you prefer a highly guided environment, you can always visit AI Valley's tech lab where all materials are provided, and our expert instructors are ready to help.
Software & Libraries Needed:
Python 3.8+: The programming language we will use. Python is the industry standard for AI and machine learning.
VS Code (or PyCharm): A reliable code editor.
OpenCV (opencv-python): An incredibly powerful open-source library used for image processing and computer vision.
MediaPipe (mediapipe): Google's framework for building cross-platform machine learning pipelines. We use this instead of older methods (like Haar Cascades) because it can track hands in 3D space with high accuracy in real-time.
NumPy (numpy): A library for working with arrays and matrices. (Remember, in computer vision, an image is just a giant matrix of numbers!).
To install the required libraries, open your terminal or command prompt and run:
pip install opencv-python mediapipe numpy
---
Step 1: Setting Up the Computer Vision Environment
If you want to master Python, the first step is always understanding how to structure your environment. In this step, we will import our necessary libraries, set up our webcam feed, and create the blank "virtual canvas" where our drawings will eventually appear.
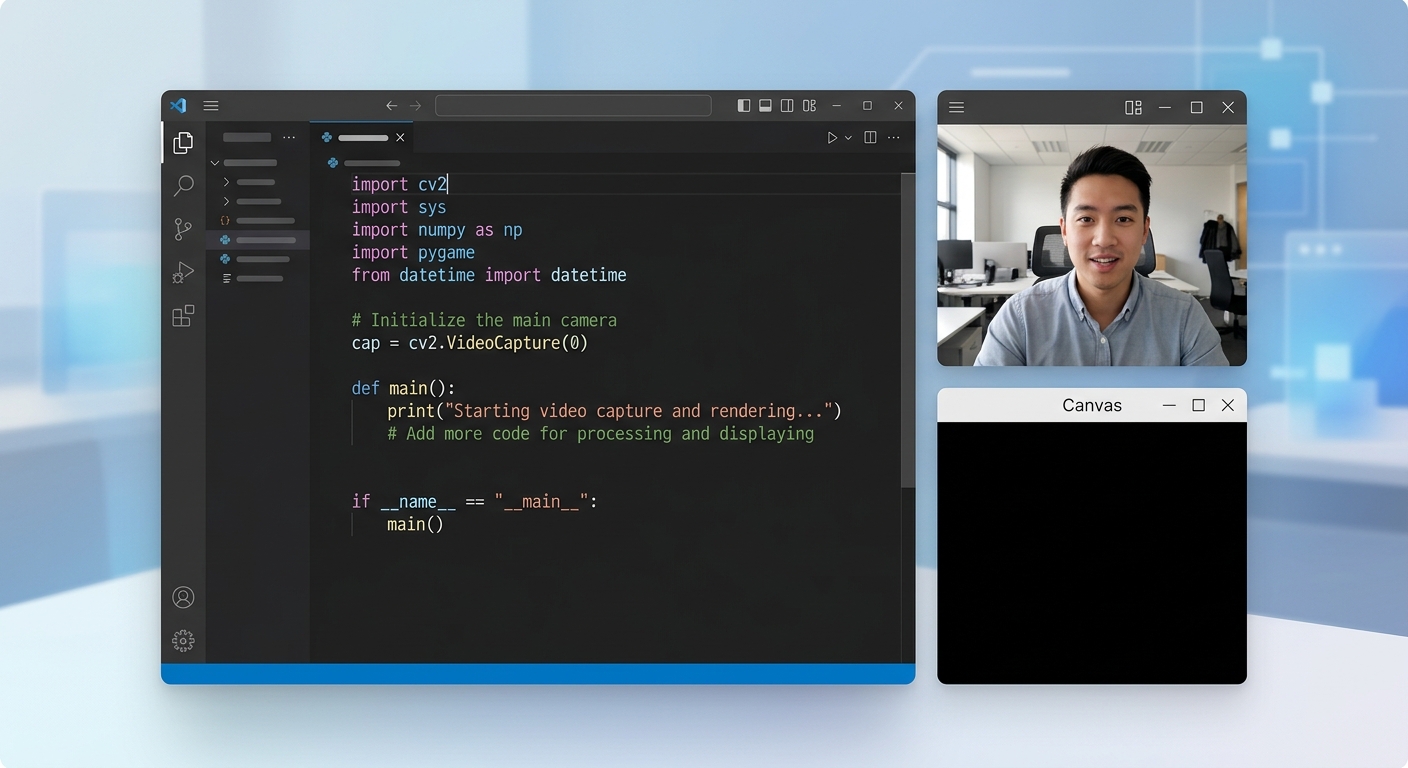
A screenshot of a code editor showing Python imports and a blank black canvas window alongside a webcam feed.
What this code does:
First, we import cv2 (OpenCV) for camera handling and numpy to create our canvas. We configure the camera to a high definition (1280x720) so we have plenty of room to draw. We then use np.zeros to create a massive grid of black pixels (our canvas).
The while True: loop continuously captures frames from the webcam. Notice the cv2.flip(img, 1)—this is crucial! It mirrors your webcam feed so that when you move your hand to the right, the image on screen also naturally moves to the right.
---
Step 2: Integrating the AI Hand Tracking Module
Now comes the artificial intelligence part! We are going to use Google's MediaPipe. This is exactly the kind of project students in our Chandigarh and Mohali weekend tech cohorts build during their computer vision modules. MediaPipe uses deep learning to instantly locate 21 specific joints (called landmarks) on your hand.
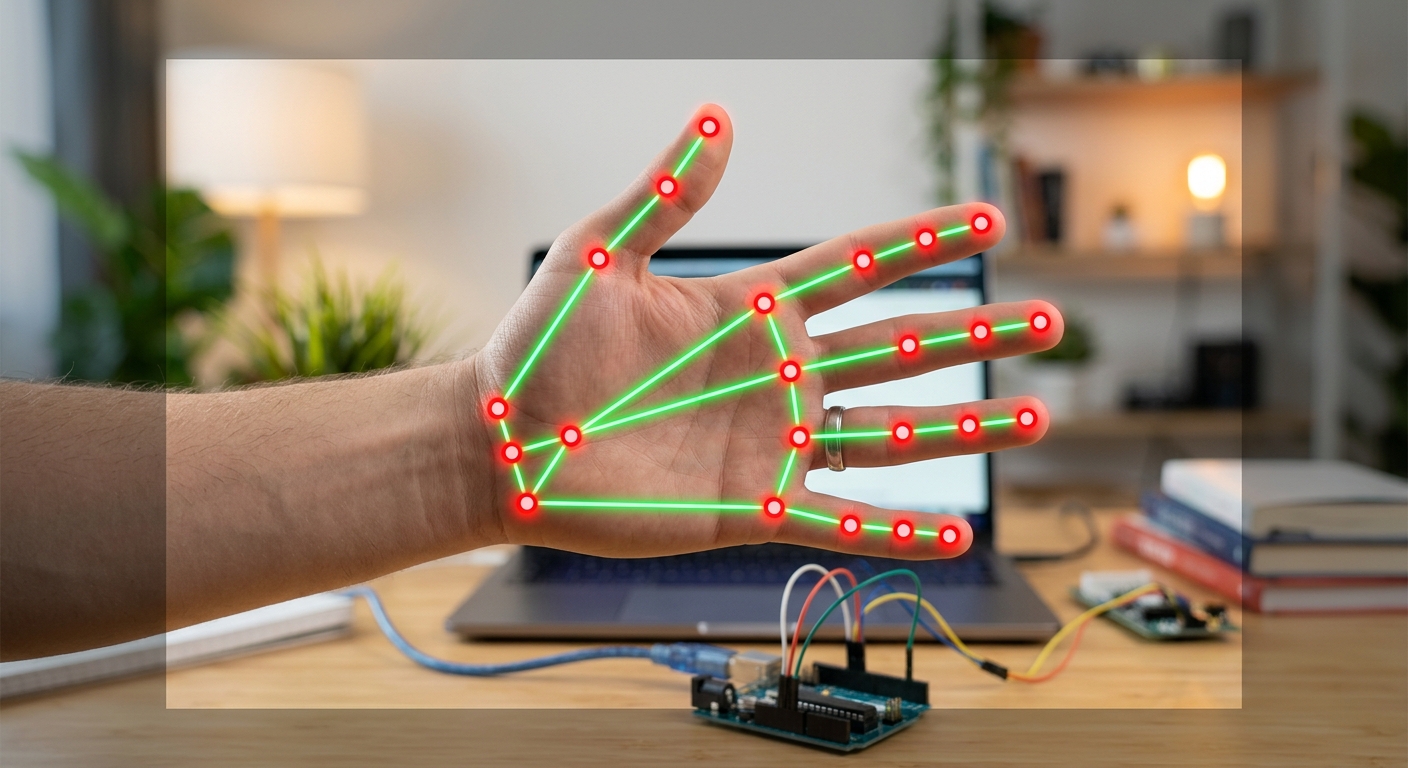
A screenshot of the webcam feed showing a human hand with glowing red and green nodes connected by lines, demonstrating MediaPipe hand tracking.
What this code does:
We set up the mp.solutions.hands module. By setting the min_detection_confidence to 0.85, we tell the AI to only track a hand if it is 85% sure it actually sees one. OpenCV naturally reads images in BGR (Blue-Green-Red) format, but MediaPipe's neural network was trained on RGB (Red-Green-Blue) images. We use cv2.cvtColor to swap the colors. Finally, if the AI finds hands (results.multi_hand_landmarks), we use mpDraw.draw_landmarks to draw dots and connecting lines over your real hand on the screen.
---
Step 3: Extracting Exact Fingertip Coordinates
To paint, we do not need all 21 points on the hand. We only really care about the tip of the Index Finger (for drawing) and the tip of the Middle Finger (for selecting colors). In this step, we will extract their exact X and Y pixel coordinates.
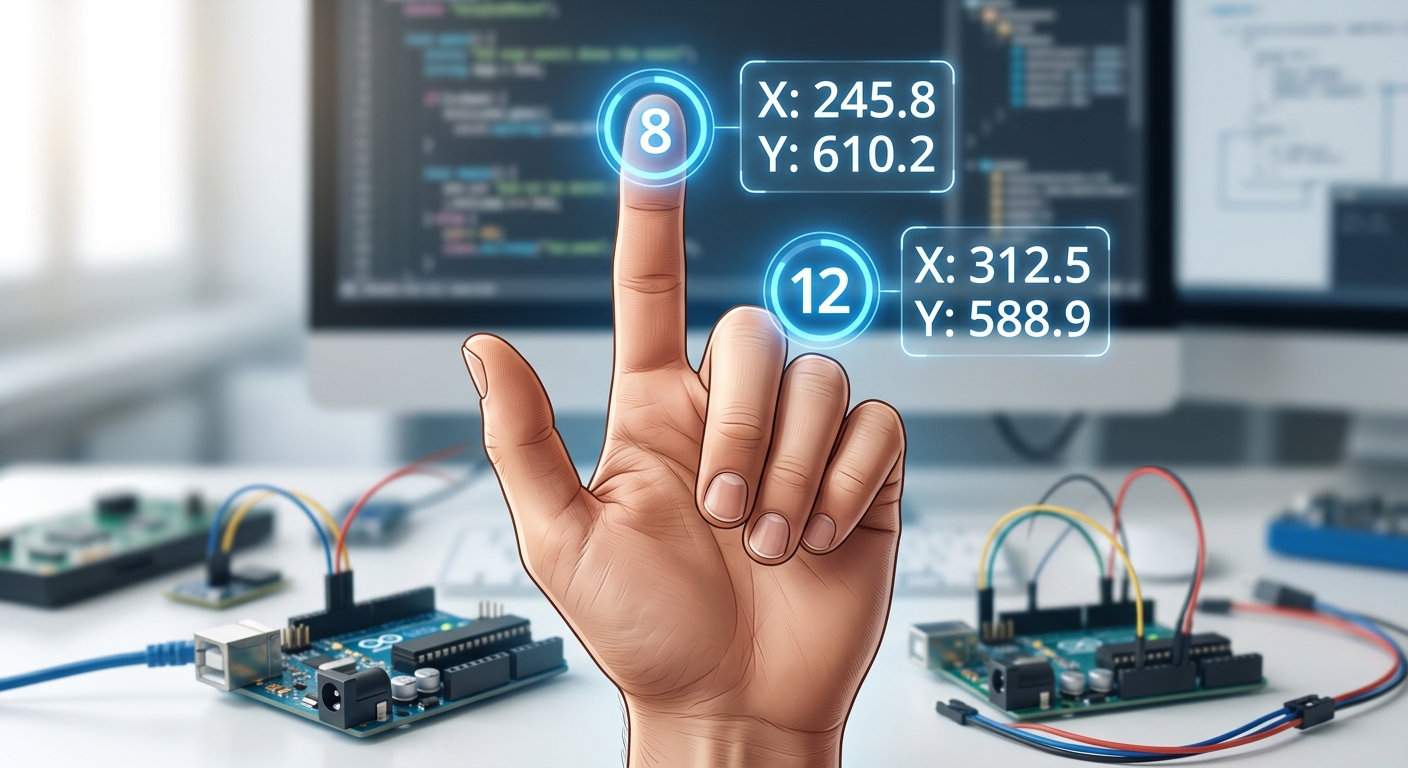
A close-up graphic of a hand showing landmark 8 on the index finger tip and landmark 12 on the middle finger tip, with X,Y coordinates printed next to them.
What this code does:
MediaPipe provides landmark positions as decimal percentages of the screen (e.g., an X value of 0.5 means the exact middle of the screen horizontally). To get the actual pixel location, we multiply these decimals by the height (h) and width (w) of our image.
According to MediaPipe's official hand map, ID 8 is the index finger tip and ID 12 is the middle finger tip. We extract these and draw a bright purple circle precisely on your index finger.
---
Step 4: Creating the Drawing Logic and Color Palette
Now for the core logic! As we teach in our best Python training in Zirakpur courses, a great application needs a great user interface. We will draw a color palette at the top of the screen.
Selection Mode: If your index and middle fingers are BOTH UP, you can hover over a color to pick it. Drawing Mode: If ONLY your index finger is UP, you will leave a trail of paint.
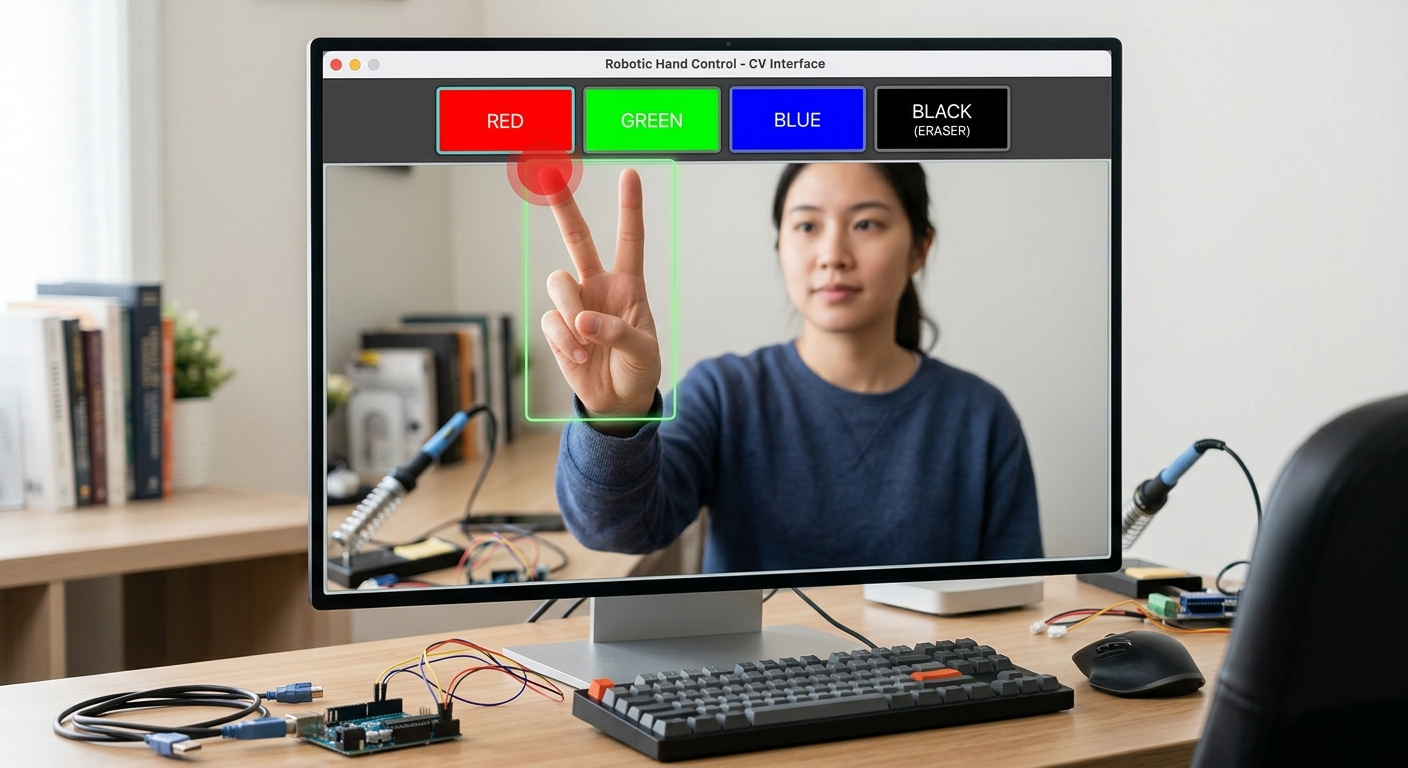
An interface showing colored rectangles at the top of the webcam feed (Red, Green, Blue, Black/Eraser) and a user holding up two fingers to select the red color.
What this code does:
We draw four colored boxes at the top of our screen using cv2.rectangle. To figure out if a finger is "up" or "down", we write a brilliant little algorithm: we compare the Y-coordinate of the fingertip to the Y-coordinate of the joint right below it. In programming, Y=0 is the top of the screen, so a lower Y value means the finger is higher up!
If two fingers are up, we check if they are touching the top 100 pixels of the screen. If they are, we change the drawColor variable. If only the index finger is up, we draw a thick line on our black imgCanvas connecting the previous point (xp, yp) to the current point (x1, y1).
---
Step 5: The Magic of Image Blending (Augmented Reality)
Right now, our drawing only shows up on the separate black canvas window. To create a true Augmented Reality experience, we need to blend the black canvas onto our live webcam feed. This is where we bring everything together using advanced array masking!
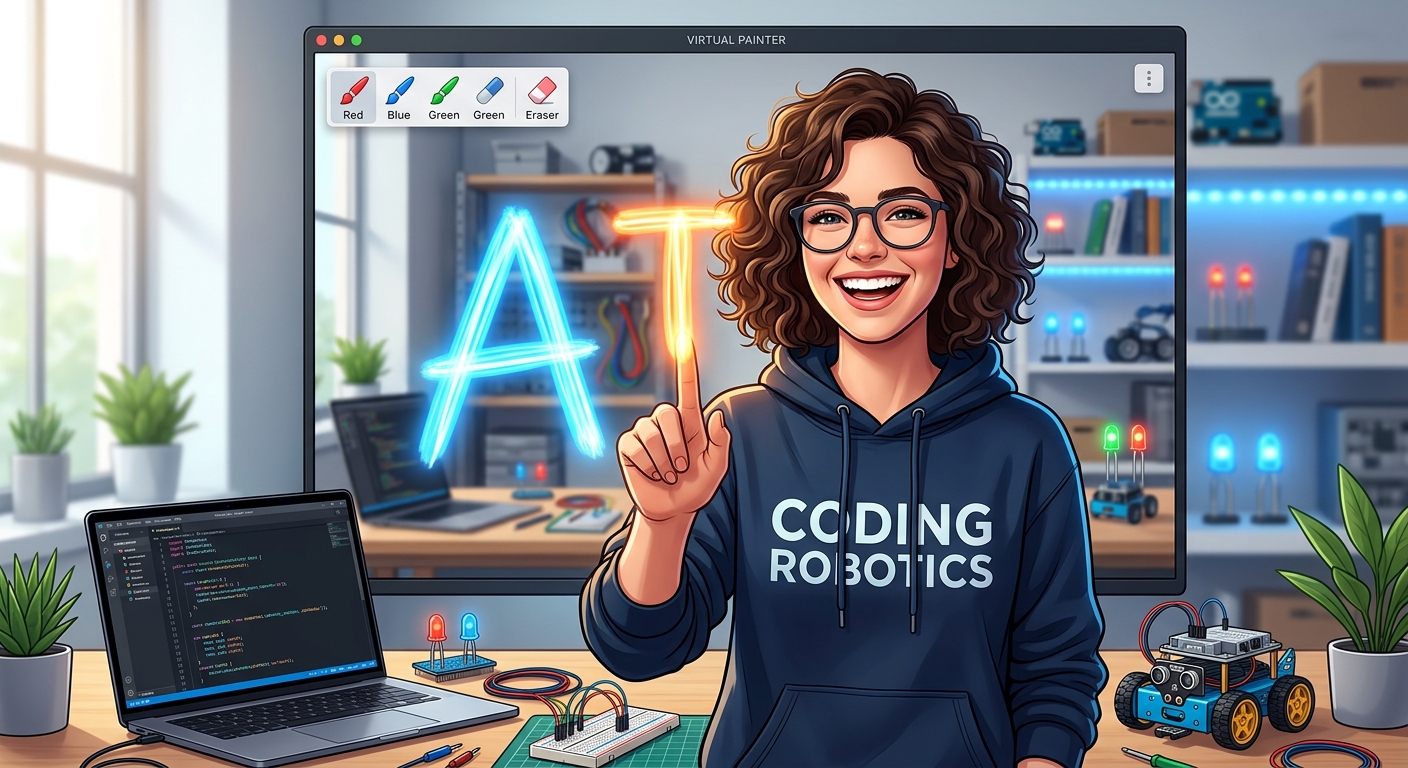
The final application running, showing a user smiling at the camera and drawing a massive, colorful 'AI' text over the live video feed.
What this code does:
The real computer vision magic happens at the very bottom. Instead of keeping the video and the drawing on two separate screens, we blend them. We take our black imgCanvas and create an inverted mask (imgInv). Everywhere we drew a color, the mask becomes black (value 0).
We overlay this mask onto our live video feed using cv2.bitwise_and to literally "carve out" the pixels in the live video where our paint should go. Then, we use cv2.bitwise_or to fill those carved-out holes with the actual bright colors from our canvas.
Expected Output: A flawless Augmented Reality experience! You will see yourself on camera, and when you hold up one finger, bright digital paint will appear seamlessly superimposed over the real world.
---
🎉 Final Result & Next Steps
Congratulations! You have just built a robust AI Virtual Painter from scratch. Not only did you learn how to process video frames using OpenCV, but you also integrated state-of-the-art machine learning models using MediaPipe to interpret human gestures. You built custom interface logic and mastered complex image blending techniques. This is exactly why Python is the leading language for Artificial Intelligence—it opens the door to endless creative possibilities.
🚀 Challenge: Take It Further
Your coding journey does not have to stop here! Here are a few ways you can level up this project: Add Shapes Mode: Can you program it so that if three fingers are held up, it calculates the distance between them and draws a perfect rectangle or circle instead of a freehand line? Custom Header Graphics: Replace our simple rectangles with actual graphic images (like PNG files of paint cans or brushes) overlaid at the top of the screen. Voice Integration: In our advanced classes at AI Valley, students take this further by integrating voice commands! Imagine saying "Change to Neon Pink" and the AI automatically adjusting your brush color.🏫 Start Your AI Journey at AI Valley
Are you or your child fascinated by building futuristic technology? Whether you want to develop logic through block coding or engineer complex machine learning pipelines, AI Valley is your premier destination for tech education.
Proudly serving the entire Tricity area—including Zirakpur, Chandigarh, Mohali, and Panchkula—we focus on hands-on, project-based learning rather than just boring theory. Our expert instructors empower students to build real-world portfolios that stand out.
If you are looking for the absolute best coding classes in the region, do not wait. Visit aivalley.co.in or Enroll at AI Valley today to transform screen time into skill time! Let's build the future together.