
Build an AI Face Detector: Python Tutorial for Kids
Welcome to another exciting hands-on project from AI Valley, the premier hub for coding in Zirakpur and the Tricity region! Today, we are going to dive into the fascinating world of Computer Vision by building your very own AI-powered Face Detector using Python.
Whether you are a young learner joining our AI classes Tricity programs or an adult looking to upgrade your tech skills, this project will take you from zero to AI developer in just a few minutes.
🎯 What You'll Build
In less than 40 lines of code, you will create a smart computer vision application. Your Python script will automatically turn on your computer's webcam, scan the live video feed for human faces, and instantly draw a glowing green tracking box around them in real-time!📋 Prerequisites & Materials
Before we begin, make sure you have the following tools ready on your computer:Python 3.8 or higher: Installed on your machine. (Download from python.org) Code Editor: We highly recommend VS Code (Visual Studio Code), PyCharm, or Thonny for beginners. A Webcam: A built-in laptop camera or a USB webcam. OpenCV Library: The open-source computer vision library we will use to process images.
---
Step 1: Setting Up Your Workspace & Installing OpenCV
The first step in any modern AI project is setting up your environment and installing the necessary libraries. For this project, we need OpenCV (Open Source Computer Vision Library). OpenCV is a massive library used by professional engineers for everything from robotics to self-driving cars!
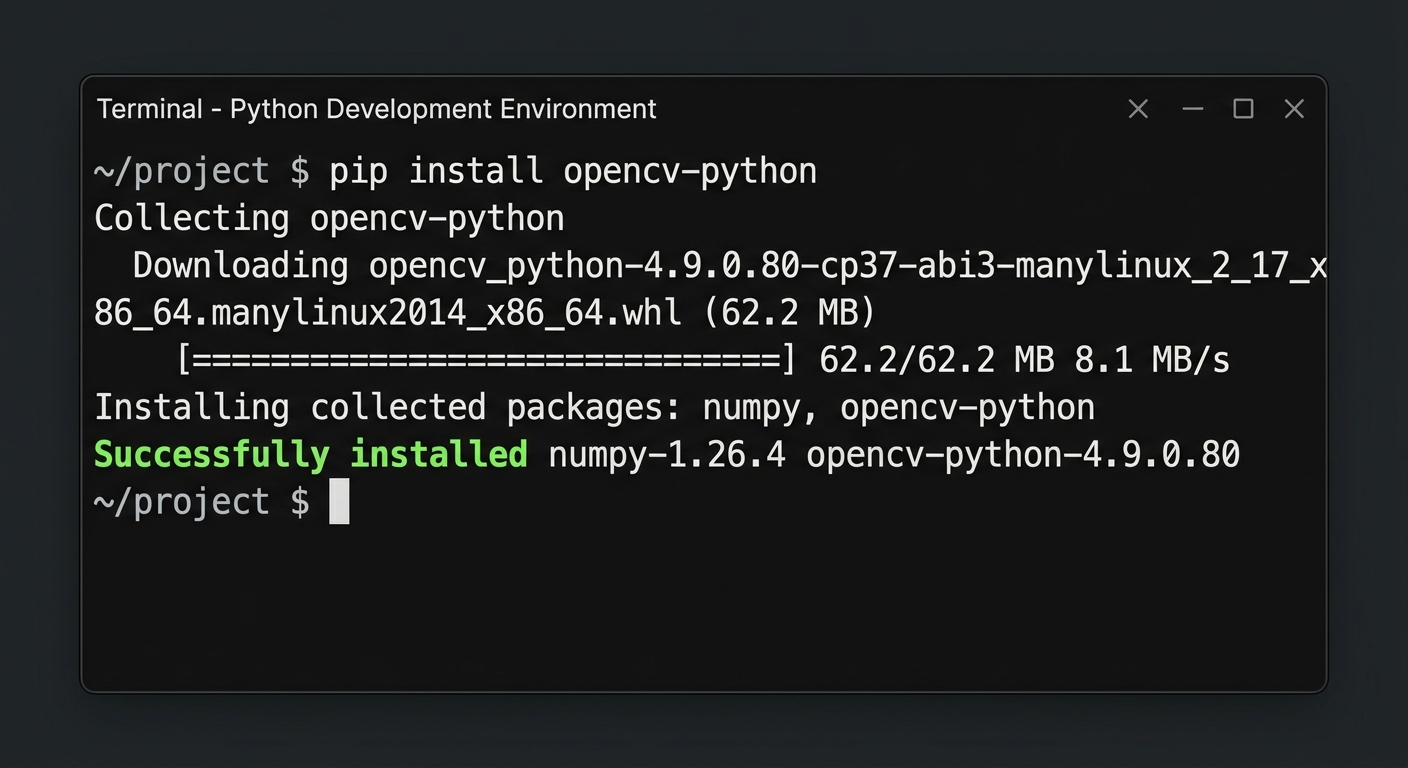
A screenshot of a computer screen showing the VS Code editor terminal window where the pip install opencv-python command is successfully running.
Open your terminal (or command prompt) and run the following command to install the required package:
Expected Output: You should see a progress bar downloading the library, followed by a message saying Successfully installed opencv-python.
Next, open your code editor, create a new folder for your project, and inside it, create a new file named face_detector.py. Let's write our first lines of code to verify the installation.
Expected Output: When you run this script, the terminal will print your installed OpenCV version (for example, OpenCV version successfully loaded: 4.8.0).
---
Step 2: Activating Your Webcam Stream
Now that OpenCV is ready, let's write the code to tap into your computer's webcam. Video is just a series of still images (called frames) displayed very quickly. We need to tell Python to grab those frames one by one.
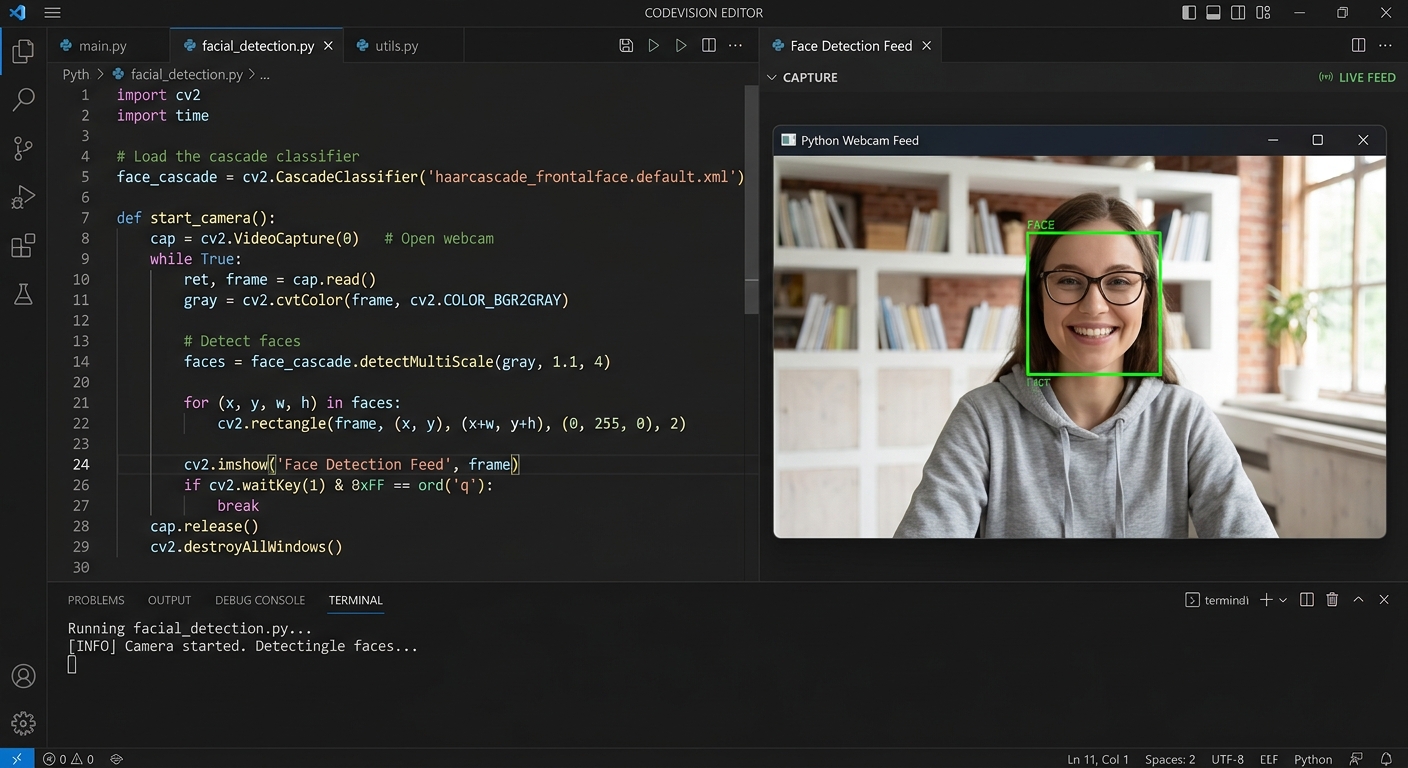
A split screen showing Python code on the left and a live window displaying a basic video feed of a person waving on the right.
Delete the previous test code in face_detector.py and replace it with this:
Expected Output: A new window titled "AI Valley - Live Camera" will pop up showing your live webcam feed. Pressing the 'q' key on your keyboard will close the window and end the program safely.
---
Step 3: Loading the AI "Brain" (Haar Cascade)
To detect faces, we don't need to train an AI from scratch. OpenCV comes with pre-trained AI models called Haar Cascades. These models have already analyzed thousands of faces to learn what a human face looks like (understanding the shadows of the eyes, the bridge of the nose, etc.).
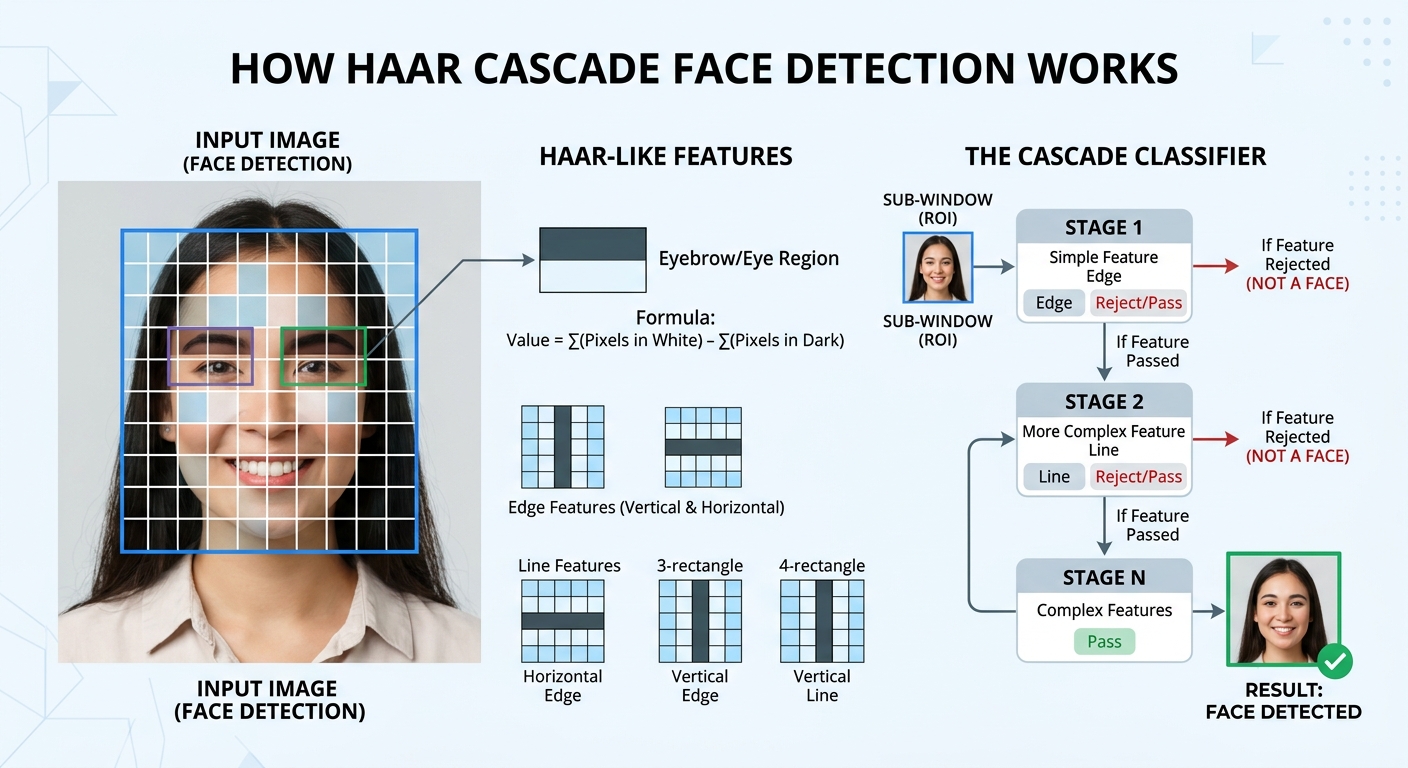
A visual diagram explaining Haar Cascade facial detection, showing a black-and-white grid overlaid on a human face highlighting the dark regions of the eyes and lighter region of the nose.
We need to load this pre-trained file into our program. OpenCV conveniently stores this file internally, so we can access it using cv2.data.haarcascades.
Add this single but powerful line of code right after your import cv2 statement:
Expected Output: When you run this, your terminal will print AI Vision Model Loaded Successfully!, confirming your program is ready to process faces.
---
Step 4: Processing the Image in Grayscale
Computer vision models process images much faster when they don't have to worry about colors. Colors add unnecessary data, whereas facial detection mostly relies on shadows and contrast (light vs. dark areas).
Therefore, our next step is to convert every frame from our webcam into Grayscale before handing it to our AI model.

An image showing a side-by-side comparison of a full-color webcam frame on the left, and its exact grayscale equivalent on the right.
Let's integrate the grayscale conversion and the actual detection logic into our main while loop:
Expected Output: You will see a black-and-white (grayscale) live feed of yourself. Look at your terminal! Every time it sees your face, it will print Detected 1 face(s). If you cover your face, it will print Detected 0 face(s).
---
Step 5: Drawing Bounding Boxes (The Final Code!)
We have the detection working, but just printing text to the terminal isn't very visual. The detectMultiScale function returns a list of coordinates for every face it finds: x (horizontal position), y (vertical position), w (width), and h (height).
Let's use these coordinates to draw a bright green rectangle around the face on our original colored image!
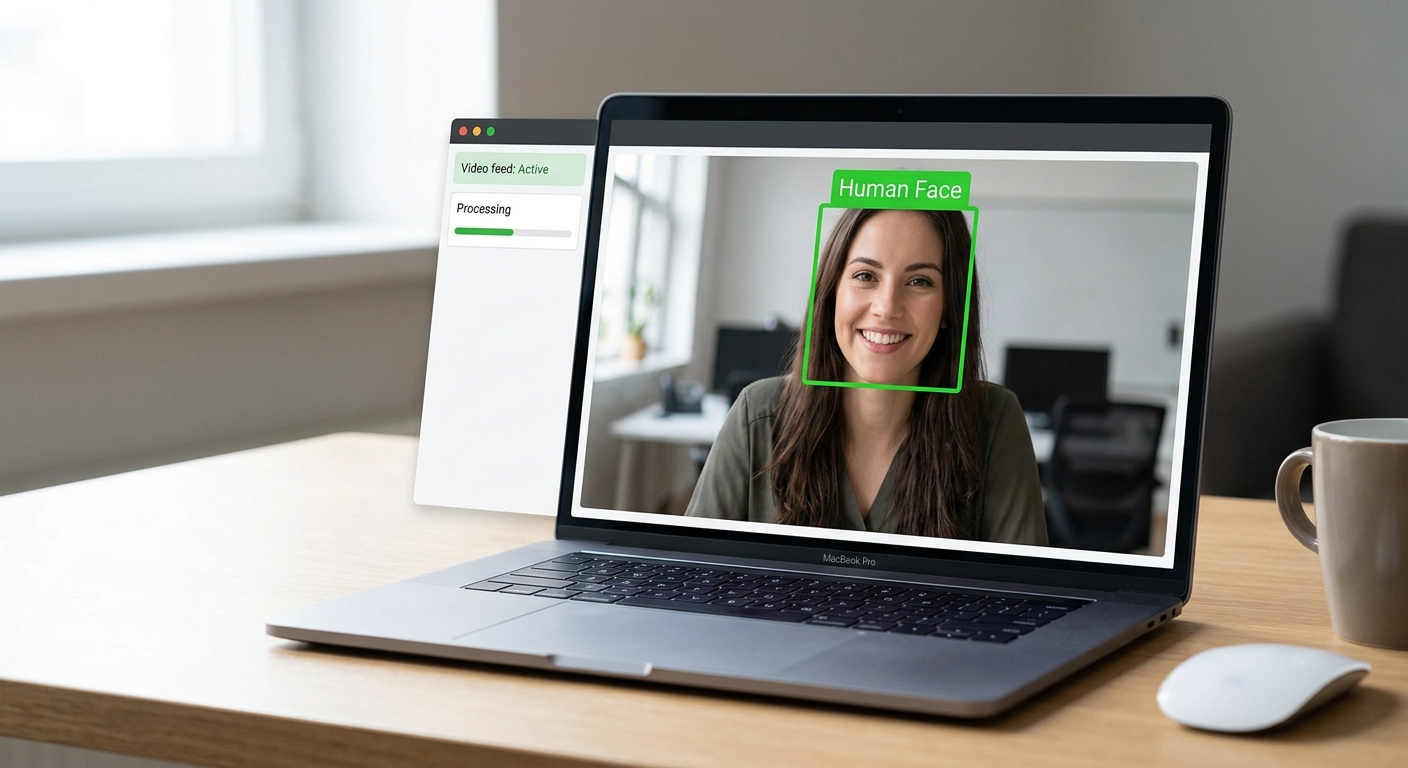
A screenshot of the finalized application running, showing a smiling student looking at their laptop camera with a bright, thick green rectangle tracking their face.
Here is your complete, 100% working final code:
Expected Output: When you run this script, a full-color window will open. As you move around, a bright green box labeled "Human Face" will seamlessly track your face in real-time. Invite a friend or family member into the frame—it will draw boxes around both of your faces simultaneously!
🎉 Final Result
Congratulations! You have just built a real-time AI Face Detection application. You've learned how to manage video streams, utilize pre-trained AI models, process images in grayscale, and map pixel coordinates to draw shapes using Python. This is the exact foundational technology used in modern security systems, smart phone cameras, and social media filters.🚀 Challenge: Take It Further
In our advanced AI classes at AI Valley in Zirakpur, students from Chandigarh, Panchkula, and across the Tricity take projects like this much further. Here are some ideas: Ready to test your new skills? Try these three challenges to upgrade your project:cv2.putText and len(faces)).haarcascade_eye.xml. Can you figure out how to load it and draw smaller boxes around your eyes inside the face region?